PrettyShot guide
How to add a background to a screenshot
To add a background to a screenshot, import the image into PrettyShot, open the Background controls, choose a wallpaper, gradient, color, or clear canvas, then add enough padding for the background to remain visible around the capture.
The short version
- 01
Import
Select the screenshot or photo from your phone and confirm the crop.
- 02
Open Background
Switch between Wallpaper, Gradient, Color, and Clear.
- 03
Create space
Increase padding so the chosen background forms a visible frame.
- 04
Save
Select an aspect ratio and export the finished image.
Choose the crop before choosing the background
The background is a frame, so first decide what belongs inside it. Crop notification bars, unrelated navigation, and empty areas that make the subject look small. Keep source details that matter, such as a customer name or social handle, only when you have permission and they help establish context.
A narrow quote screenshot and a square product image need different framing. Do not force both into the same template. PrettyShot starts from the imported image and lets you select a final canvas separately, which means you can preserve the content while changing the space around it.
When to use a wallpaper background
Wallpaper works best when the screenshot has a simple silhouette and a clear edge. Look for an image with an area of low detail where the capture will sit. Landscapes, soft textures, and broad color fields usually leave enough visual room. Busy wallpaper behind small text can reduce readability even when the screenshot itself is opaque.
Match the mood to the message. A client testimonial may suit a calm landscape. A product launch can handle a brighter, more graphic wallpaper. PrettyShot includes curated wallpaper groups, and the preview lets you move quickly through them while seeing the real screenshot rather than a generic placeholder.
When a gradient or solid color works better
Gradients create depth without introducing objects behind the screenshot. They are useful for social posts, product announcements, and quote cards where the source capture needs to remain dominant. Pick a gradient that has enough tonal difference from the screenshot edge, then keep the corner and shadow treatment simple.
A solid color is the safest option when the screenshot is already colorful. Sample a supporting tone from the capture or choose a neutral that fits the destination. Solid backgrounds also make a set of screenshots feel consistent across a thread, help article, or launch carousel.
Make the background visible with padding
Changing the background will have little effect if the screenshot still fills the entire canvas. Add padding until the background reads as an intentional border. Check the top and bottom as well as the sides, since tall exports can create uneven visual weight when all values are technically equal.
For a screenshot with dense text, favor less padding and a larger content area. For a simple product photo or a single short quote, wider space can make the result feel calmer. Rounded corners and a shadow help complete the separation, but the spacing does most of the structural work.
Export a version for each destination
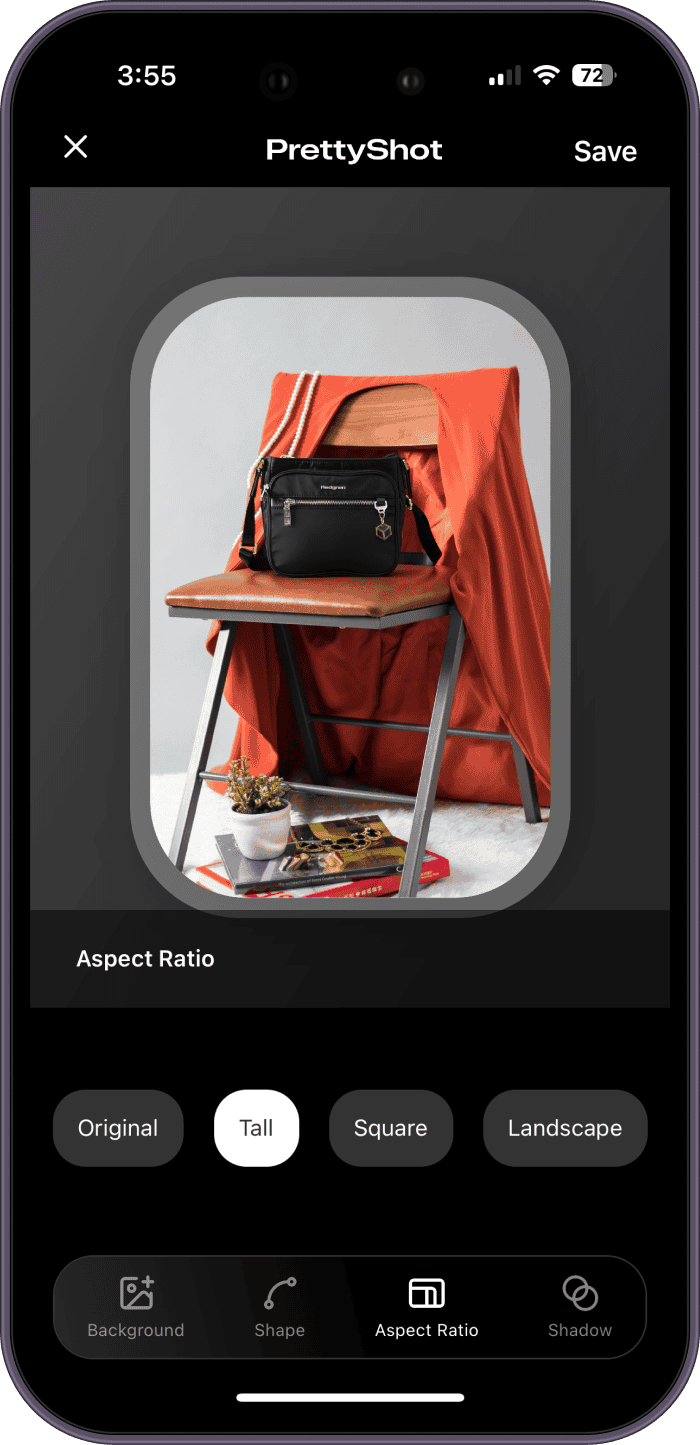
Use Square for flexible feed sharing, Tall for vertical placements, Landscape for wide presentations, or Original when you only need the background treatment. The background may crop differently in each format, so inspect the subject position and contrast after changing the ratio.
Save the cleanest master export first. If you need multiple versions, return to the same design and switch only the aspect ratio. This keeps the colors, spacing, corners, and shadow consistent while giving each platform an image built for its available space.
Questions about this workflow
Can I put a gradient behind a screenshot on my phone?
Yes. Import the screenshot into PrettyShot, choose Gradient under Background, then adjust the canvas spacing before saving.
Can a screenshot have a transparent background?
PrettyShot includes a Clear background option. Whether transparency is preserved depends on the selected export path and file format, so check the saved result before placing it in another design.